Category:

Home Improvement

Moving can be a daunting task, but with the right house moving company in Auckland, it can become a smooth and stress-free experience. Auckland, known for its bustling urban life and diverse neighborhoods, offers a plethora of options when it comes to moving services. Whether you’re relocating within the city or moving to Auckland from another location, selecting the best house moving company is crucial for a successful transition.

Factors to Consider When Choosing House Moving Companies in Auckland

  1. Reputation and Reliability: When researching house moving companies in Auckland, prioritize those with a solid reputation for reliability. Check online reviews and testimonials from previous customers to gauge their service quality and customer satisfaction levels.
  2. Experience and Expertise: Look for companies that have extensive experience in handling moves similar to yours. Experienced movers are more likely to navigate potential challenges effectively, ensuring your belongings arrive safely and on time.
  3. Services Offered: Different moving companies in Auckland offer varying services. Some may specialize in residential moves, while others offer additional services like packing, storage, or even international relocation. Choose a company that aligns with your specific needs.
  4. Cost and Affordability: Moving costs can vary significantly depending on the company and the scope of services required. Obtain quotes from multiple house moving companies in Auckland to compare prices and ensure transparency in pricing.

Why Choose Professional House Moving Companies in Auckland?

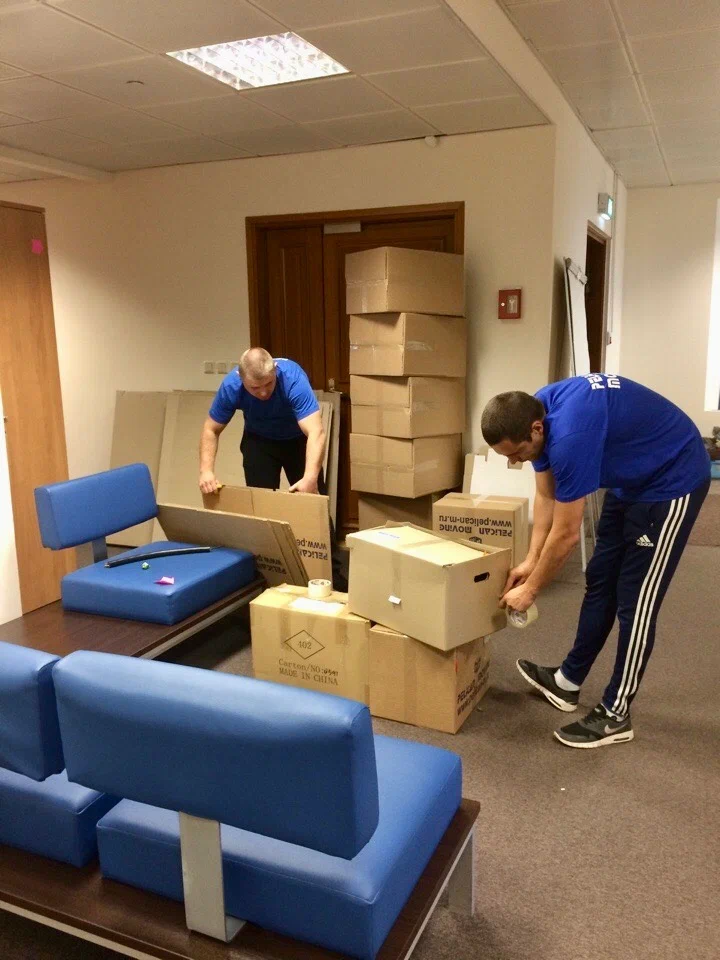
Professional movers bring expertise and efficiency to the table, making your move less stressful and more organized. They handle logistics, packing, transportation, and even unpacking if needed, allowing you to focus on settling into your new home.

How to Find the Right House Moving Company in Auckland

  1. Research Thoroughly: Utilize online resources, local directories, and recommendations from friends or family to create a shortlist of potential house moving companies in Auckland.
  2. Get Quotes: Contact the companies on your list and request detailed quotes that outline the services included and any potential additional costs.
  3. Check Credentials: Ensure the company is licensed and insured. This not only protects your belongings but also ensures you’re working with a legitimate and accountable business.
  4. Ask Questions: Don’t hesitate to ask questions about their experience, the equipment they use, and their approach to handling fragile or valuable items.

Conclusion

Choosing the best house moving company in Auckland involves careful consideration of their reputation, services, and affordability. By taking the time to research and compare your options, you can ensure a smooth and successful moving experience, whether you’re moving across town or across the country. Trustworthy movers in Auckland can turn a potentially stressful event into a seamless transition to your new home.

When it comes to house moving companies Auckland, making an informed choice ensures your belongings are in safe hands throughout the moving process. Whether you prioritize reliability, affordability, or comprehensive services, finding the right movers can make all the difference in your moving day experience.

0 comment
0 FacebookTwitterPinterestEmail

If you’re tired of being woken up by the morning sun or disturbed by streetlights at night, DIY blackout curtains can be a game-changer. Blackout curtains are designed to block out light, providing you with a darker, more restful environment. Not only do they improve your sleep quality, but they also add a touch of style to your room. Here’s how you can create your own blackout curtains with a few simple projects.

Why Choose Blackout Curtains?

Blackout curtains are specifically designed to block out sunlight and reduce outside noise. They are ideal for bedrooms, media rooms, or any space where you want to control the light and enhance privacy. By making your own, you can customize the fabric, color, and size to fit your home’s decor and your specific needs.

Materials Needed

  1. Blackout Fabric: This is the core of your project. Blackout fabric is available at most fabric stores and online. It’s designed to block light effectively.
  2. Regular Curtain Fabric: Choose a fabric that complements your interior design.
  3. Sewing Machine: For stitching the fabric together.
  4. Curtain Rod and Rings: To hang your new curtains.
  5. Measuring Tape and Scissors: For accurate cutting and measuring.
  6. Thread and Pins: To hold the fabric in place while sewing.

Project 1: Basic Blackout Curtains

Step 1: Measure and Cut
Measure the dimensions of your window to determine the size of your blackout curtains. Cut both the blackout fabric and the decorative fabric to the desired size, adding a few extra inches for hems.

Step 2: Sew the Layers Together
Place the blackout fabric and the decorative fabric together with the right sides facing each other. Sew along the edges, leaving the top open. Turn the fabric inside out, so the decorative side is visible.

Step 3: Hem the Curtains
Fold the raw edges of the top and sides over and hem them to prevent fraying. Attach the curtain rings to the top edge.

Step 4: Hang and Enjoy
Install your curtain rod and hang your new blackout curtains. Adjust as needed to ensure a proper fit and complete light blockage.

Project 2: Lined Blackout Curtains

Step 1: Prepare the Fabric
Cut the blackout fabric and the lining fabric to the same size, considering the length and width of your window. The lining fabric adds an extra layer of insulation and helps the curtains hang more smoothly.

Step 2: Assemble the Curtain
Lay the blackout fabric on top of the lining fabric with the right sides facing each other. Sew along the edges, leaving the top open. Turn the fabric right side out.

Step 3: Add a Heading Tape
To make the curtains easy to hang, sew heading tape along the top edge of the curtain. This will allow you to attach the curtains to the rod with hooks or rings.

Step 4: Final Touches
Hem the sides and bottom of the curtains for a polished look. Hang them on your curtain rod and adjust as necessary.

Project 3: Blackout Curtain Panels

Step 1: Cut the Panels
Decide how many panels you want and cut the blackout fabric accordingly. Panels can be used to cover large windows or sliding doors.

Step 2: Assemble the Panels
Sew the panels together along the edges to create a cohesive look. You can use a simple straight stitch or add decorative trim for extra flair.

Step 3: Install the Panels
Use curtain rings or hooks to hang each panel individually. This allows you to open and close each panel separately, giving you more control over the amount of light let in.

Tips for Success

  • Choose the Right Fabric: High-quality blackout fabric ensures better light blockage. Check the fabric’s opacity before purchasing.
  • Proper Measurements: Accurate measurements are crucial for a perfect fit. Always measure twice before cutting.
  • Iron Before Hanging: Iron the curtains before hanging them to remove any wrinkles and give them a crisp, professional finish.

Creating your own blackout curtains is not only a cost-effective solution but also allows you to tailor them to your exact preferences. With these easy DIY projects, you can enjoy a dark, peaceful space that’s perfect for sleeping, relaxing, or watching movies.

0 comment
0 FacebookTwitterPinterestEmail

Handmade furniture offers a unique blend of craftsmanship, quality, and character that sets it apart from mass-produced pieces. Investing in handmade furniture can enhance the beauty, comfort, and value of your home.

The Appeal of Handmade Furniture

  • Unique Designs: Handmade furniture is often one-of-a-kind, reflecting the artisan’s individual style and creativity.
  • Quality Materials: Artisans typically use high-quality materials, ensuring durability and longevity.
  • Attention to Detail: Handmade pieces are crafted with meticulous attention to detail, resulting in a superior finish.
  • Sustainability: Many handmade furniture makers use sustainable materials and environmentally friendly practices.
  • Personal Touch: Handmade furniture can add a personal touch to your home, reflecting your unique taste and personality.

Types of Handmade Furniture

  • Wooden Furniture: From rustic farmhouse tables to sleek modern chairs, wooden furniture offers a timeless and classic look.
  • Upholstered Furniture: Sofas, armchairs, and ottomans provide comfort and style. Choose from a variety of fabrics and upholstery styles.
  • Metal Furniture: Metal furniture, such as wrought iron or stainless steel, can add a touch of industrial chic to your home.
  • Custom Furniture: Work with an artisan to create a truly personalized piece that meets your specific needs and preferences.

Finding Handmade Furniture

  • Local Artisans: Visit local furniture workshops or craft fairs to discover unique pieces from talented artisans.
  • Online Marketplaces: Explore online platforms like Etsy, ArtFire, and Folksy to find a wide range of handmade furniture from around the world.
  • Interior Design Showrooms: Some interior design showrooms carry curated collections of handmade furniture.
  • Antique Stores and Flea Markets: Discover vintage or antique furniture pieces with character and history.

Tips for Buying Handmade Furniture

  • Set a Budget: Determine your budget and prioritize which pieces are most important to you.
  • Consider Your Style: Choose furniture that complements your home’s overall aesthetic.
  • Evaluate Craftsmanship: Pay attention to details like joinery, finishes, and materials used.
  • Negotiate Price: Don’t be afraid to negotiate for a fair price, especially when buying directly from artisans.
  • Read Reviews: Check reviews from other customers to get insights into the quality and reliability of the seller.

Caring for Handmade Furniture

  • Regular Cleaning: Dust and vacuum furniture regularly to maintain its appearance.
  • Protect from Sunlight and Heat: Avoid direct sunlight and heat sources to prevent damage.
  • Use Appropriate Cleaning Products: Use gentle cleaning products suitable for the specific materials of your furniture.
  • Professional Care: Consider professional cleaning or restoration for delicate or antique pieces.

By investing in handmade furniture, you’re not just buying pieces for your home; you’re investing in quality, craftsmanship, and a unique piece of art that will enhance your living space for years to come.

0 comment
0 FacebookTwitterPinterestEmail

The cost of building a pergola can vary significantly depending on several factors. Here’s a breakdown of the key factors that influence the price:

1. Size and Complexity:

  • Dimensions: The larger and more complex the pergola design, the higher the cost.
  • Features: Additional features like built-in seating, lighting, or water features will increase the price.

2. Materials:

  • Wood: Pressure-treated lumber is generally more affordable than premium woods like cedar or redwood.
  • Metal: Metal pergolas can be more expensive, especially if they require custom fabrication or specialized coatings.
  • Vinyl: Vinyl pergolas are often a budget-friendly option.

3. Labor Costs:

  • DIY vs. Professional: Building a pergola nz yourself can save on labor costs, but it requires time and effort.
  • Local Rates: Labor rates vary depending on your location and the complexity of the project.

4. Permits and Inspections:

  • Local Requirements: Check with your local building department for any required permits and inspections.
  • Costs: Permit fees and inspection costs can vary depending on your location.

5. Additional Features:

  • Roofing: A solid roof will add to the cost, especially if you choose materials like metal or tile.
  • Decking: Installing decking on top of the pergola will increase the overall cost.
  • Lighting and Electrical: Adding lighting or electrical outlets will incur additional expenses.

6. Landscaping and Site Preparation:

  • Groundwork: Preparing the ground for the pergola, including leveling and removing debris, may incur additional costs.
  • Landscaping: Adding landscaping elements like plants, flowers, or pavers around the pergola can increase the overall project cost.

Average Costs:

  • DIY Pergola: Building a simple pergola yourself can cost around $500-$1,500.
  • Professional Installation: Hiring a professional contractor can cost anywhere from $1,000 to $5,000 or more, depending on the size, complexity, and materials used.

It’s important to obtain quotes from multiple contractors and compare pricing to find the best deal for your specific project. By carefully considering these factors, you can get a better estimate of the cost of building a pergola and make an informed decision.

0 comment
0 FacebookTwitterPinterestEmail

Choosing the right house moving companies auckland can significantly impact the success and stress level of your move. Here are 10 essential questions to ask before making your decision:

1. Are you licensed and insured?

  • A reputable moving company will have the necessary licenses and insurance to protect your belongings.

2. How long have you been in business?

  • Experience often indicates reliability and expertise in the moving industry.

3. Can you provide references?

  • Ask for references from previous customers to get firsthand insights into their experiences.

4. What is your moving process like?

  • Understand the company’s steps involved in the moving process to ensure it aligns with your expectations.

5. Do you offer packing services?

  • If you need help packing, inquire about the company’s packing services and costs.

6. What is your cancellation policy?

  • Understand the terms and conditions for canceling the move, especially if your plans change.

7. Are there any hidden fees or charges?

  • Ensure that the quoted price includes all necessary services and there are no unexpected costs.

8. What is your insurance coverage?

9. How do you handle fragile or valuable items?

  • Inquire about the company’s procedures for handling delicate items to ensure their safety.

10. Can you provide a detailed estimate?

  • Request a detailed estimate that outlines the services, costs, and any additional fees.

By asking these questions, you can gather the necessary information to make an informed decision and select a moving company that meets your needs and expectations.

0 comment
0 FacebookTwitterPinterestEmail

Aluminium box sections are widely used in construction, automotive, and manufacturing industries for their lightweight and durable properties. Whether you’re fabricating a structural framework or crafting custom components, knowing how to cut and weld aluminium box sections properly is essential to achieving strong, precise joints.

Understanding Aluminium Box Section

Aluminium box sections, also known as hollow structural sections (HSS), come in square or rectangular shapes with varying thicknesses and dimensions. They are extruded from aluminium alloys like 6061 or 6063, chosen for their strength, corrosion resistance, and weldability.

Tools and Equipment Needed

Before starting, gather the necessary tools and equipment:

  • Circular Saw or Miter Saw: Equipped with a fine-toothed carbide-tipped blade suitable for cutting aluminium.
  • Measuring Tools: Tape measure, square, and marker for accurate measurements and marking.
  • Clamps: Ensure secure positioning of the box section during cutting and welding.
  • Welder: TIG (Tungsten Inert Gas) or MIG (Metal Inert Gas) welder suitable for aluminium.
  • Protective Gear: Welding helmet, gloves, and safety glasses to protect against sparks and UV radiation.

Step-by-Step Guide to Cutting Aluminium Box Section

1. Measure and Mark

Measure the desired length of the aluminium box section using a tape measure and square. Mark the cutting line with a marker, ensuring it’s clear and precise.

2. Secure the Box Section

Securely clamp the aluminium box section to a workbench or sawhorse. Ensure it’s stable and won’t move during cutting to maintain accuracy.

3. Cutting Process

Using a circular saw or miter saw equipped with an appropriate blade for aluminium, carefully cut along the marked line. Apply steady pressure and avoid rushing to maintain a clean, straight cut.

4. Deburring

After cutting, use a file or deburring tool to remove any sharp edges or burrs from the cut ends of the aluminium box section. Smooth edges facilitate cleaner welds and safer handling.

Step-by-Step Guide to Welding Aluminium Box Section

1. Preparing the Joint

Ensure the mating surfaces of the aluminium box section are clean and free of contaminants. Use a wire brush or chemical cleaner to remove oxidation or oils that can affect weld quality.

2. Tack Welding

Position the aluminium box sections according to your project’s design. Use tack welds—small, temporary welds—to hold the pieces together before making the final welds. Tack welds prevent misalignment during the welding process.

3. Welding Technique

Set up your welder according to the aluminium welding specifications. For TIG welding, use a non-consumable tungsten electrode and argon gas shielding. For MIG welding, use a spool gun and appropriate wire feed settings.

4. Making the Welds

Start welding from one end of the joint, moving in a consistent, steady motion. Control heat input to prevent overheating and distortion of the aluminium box section. Aim for smooth, continuous weld beads to ensure strong, durable joints.

Safety Tips

  • Always wear appropriate protective gear when cutting and welding aluminium box sections.
  • Work in a well-ventilated area to disperse welding fumes and gases.
  • Keep a fire extinguisher nearby when working with flammable materials.

Conclusion

Mastering the art of cutting and welding aluminium box sections requires practice, patience, and attention to detail. By following this step-by-step guide and using the right tools and techniques, you can achieve precise cuts and strong welds that meet the demands of your project. Whether you’re building structures, fabricating components, or creating custom designs, aluminium box sections offer versatility and strength when handled correctly. Practice these skills to enhance your fabrication capabilities and ensure the success of your aluminium-based projects.

0 comment
0 FacebookTwitterPinterestEmail

A kitchen renovation auckland can significantly enhance your home’s functionality, aesthetic appeal, and overall value. While it may seem like a significant expense upfront, it can be a worthwhile investment with long-term benefits.

Increased Property Value:

  • Attractive Feature: A well-designed and updated kitchen is a highly desirable feature for potential homebuyers.
  • Return on Investment: Kitchen renovations often have a high return on investment, making them a worthwhile investment if you plan to sell your home in the future.

Improved Functionality:

  • Efficient Layout: A well-planned kitchen can improve workflow and make cooking and entertaining more enjoyable.
  • Modern Appliances: Upgrading to modern appliances can enhance efficiency and convenience.

Enhanced Aesthetics:

  • Customized Design: A renovated kitchen can be tailored to match your personal style and preferences.
  • Increased Appeal: A beautiful and inviting kitchen can create a more enjoyable living space.

Energy Efficiency:

  • Modern Appliances: Newer appliances are often more energy-efficient, helping you save money on utility bills.
  • Sustainable Materials: Consider using sustainable materials like recycled countertops or energy-efficient lighting to reduce your environmental impact.

Personal Satisfaction:

  • Enjoyable Space: A kitchen that meets your needs and reflects your personal style can provide a sense of satisfaction and enjoyment.
  • Improved Quality of Life: A well-designed kitchen can make daily tasks more enjoyable and improve your overall quality of life.

Increased Home Comfort:

  • Functional Space: A modern kitchen can create a more comfortable and inviting space for cooking, dining, and socializing.
  • Enhanced Mood: A beautiful kitchen can positively impact your mood and overall well-being.

While kitchen renovations can be costly upfront, the long-term benefits in terms of increased property value, energy efficiency, and improved quality of life can make them a worthwhile investment. By carefully planning your renovation and considering cost-saving measures, you can maximize the return on your investment.

0 comment
0 FacebookTwitterPinterestEmail

Creating a beautiful and functional outdoor space is a priority for many homeowners in New Zealand. An outdoor pergola can be a fantastic addition to your garden or backyard, offering both aesthetic appeal and practical benefits. This ultimate guide will help you navigate the process of choosing the perfect outdoor pergola NZ to enhance your outdoor living experience.

Understanding the Benefits of an Outdoor Pergola

An outdoor pergola offers several advantages:

  1. Enhanced Aesthetics: A well-designed pergola can add visual interest and charm to your garden or backyard.
  2. Outdoor Living Space: Pergolas provide a designated area for relaxation, dining, and entertaining.
  3. Shade and Shelter: Pergolas can offer protection from the sun and light rain, making your outdoor space more comfortable.
  4. Increased Property Value: Adding a pergola can boost the value of your home by improving its outdoor appeal.

Types of Pergolas

When considering an outdoor pergola in NZ, it’s essential to understand the different types available:

Freestanding Pergolas

Freestanding pergolas are not attached to any structure and can be placed anywhere in your garden. They offer flexibility in terms of location and design.

Attached Pergolas

Attached pergolas are connected to your home or another structure. They are a great option if you want to extend your living space directly from your house.

Retractable Pergolas

Retractable pergolas come with a retractable canopy, allowing you to adjust the amount of shade and sunlight as needed. These are perfect for those who want versatility in their outdoor space.

Materials for Pergolas

The material of your outdoor pergola NZ plays a crucial role in its durability, maintenance, and overall look. Common materials include:

Wood

Wooden pergolas offer a natural and classic look. They blend seamlessly with garden landscapes but require regular maintenance to prevent weathering.

Metal

Metal pergolas, such as those made from aluminum or steel, are durable and require less maintenance than wood. They can be designed in modern or traditional styles.

Vinyl

Vinyl pergolas are low-maintenance and resistant to weather conditions. They are available in various colors and styles, making them a versatile choice.

Design Considerations

When choosing the design of your outdoor pergola in NZ, consider the following factors:

Size and Scale

Ensure the pergola is proportionate to your outdoor space. A pergola that is too large or too small can look out of place.

Style

Select a style that complements your home’s architecture and your garden’s design. Whether you prefer a contemporary look or a more rustic feel, there’s a pergola design to match.

Functionality

Think about how you plan to use your pergola. Do you need it for dining, lounging, or as a focal point in your garden? Your intended use will influence the design and features of the pergola.

Installation and Maintenance

Installing an outdoor pergola in NZ can be a DIY project for those with the right skills, but professional installation is often recommended to ensure stability and safety. Once installed, regular maintenance, such as cleaning and treating the materials, will keep your pergola looking its best for years to come.

Conclusion

Choosing the right outdoor pergola in NZ involves considering various factors, from the type and material to the design and functionality. By taking the time to understand your options and needs, you can select a pergola that not only enhances your outdoor space but also adds value to your home. Whether you’re looking to create a shaded retreat, a dining area, or a stylish garden feature, an outdoor pergola can transform your outdoor living experience.

0 comment
0 FacebookTwitterPinterestEmail

A coffee table is a versatile piece of furniture that can serve both functional and decorative purposes in your living room. When selecting the right coffee table, consider the following factors:

1. Size and Shape:

  • Measure Your Space: Determine the available space in your living room to ensure the coffee table will fit comfortably.
  • Shape: Choose a shape that complements your room’s layout. Round, square, or rectangular tables are common options.

2. Style and Design:

  • Personal Preference: Select a style that matches your existing furniture and decor.
  • Materials: Consider the materials used in the coffee table, such as wood, glass, metal, or a combination of these.

3. Functionality:

  • Storage: If you need extra storage space, look for a coffee table with drawers, shelves, or a hidden compartment.
  • Versatility: Consider a coffee table that can be used for multiple purposes, such as dining or working.

4. Budget:

  • Set a Limit: Determine your budget for the coffee table. This will help you narrow down your options.
  • Quality vs. Cost: Consider the balance between quality and price. A higher-quality coffee table may be a better investment in the long run.

5. Maintenance:

  • Ease of Cleaning: Choose a material that is easy to clean and maintain.
  • Durability: Consider the durability of the materials used in the coffee table to ensure it lasts for years to come.

By carefully considering these factors, you can find the perfect coffee table to enhance the style and functionality of your living room. Remember to choose a piece that reflects your personal style and complements the overall aesthetic of your space.

0 comment
0 FacebookTwitterPinterestEmail

When it comes to transforming your home, a bathroom renovation can make a significant impact. In Auckland, homeowners are increasingly seeking innovative solutions to enhance their bathroom spaces, making them more functional and aesthetically pleasing. Here’s a look at some of the most exciting bathroom renovation Auckland trends and solutions that can elevate your bathroom experience.

1. Smart Bathroom Technology

One of the most notable trends in bathroom renovation Auckland is the integration of smart technology. Modern bathrooms are becoming increasingly high-tech, with innovations like smart toilets, digital showers, and voice-controlled lighting systems. Smart toilets offer features such as bidet functions, heated seats, and self-cleaning capabilities, while digital showers allow you to control water temperature and pressure with precision. These advancements not only enhance comfort but also promote water and energy efficiency.

2. Luxurious Materials and Finishes

For those looking to create a spa-like retreat, luxurious materials and finishes are a key aspect of bathroom renovation Auckland. High-quality tiles, such as marble or quartz, can add a touch of elegance and sophistication. Additionally, sleek fixtures in matte black or brushed gold can make a stylish statement. Incorporating natural elements like wood or stone can also bring warmth and texture to the space, making your bathroom feel both inviting and upscale.

3. Space Optimization Solutions

In many Auckland homes, bathrooms can be on the smaller side. Innovative space optimization solutions are essential in these cases. Floating vanities and wall-mounted toilets can create the illusion of more space by freeing up floor area. Custom-built storage solutions, such as recessed shelves or built-in cabinets, help to maximize every inch of your bathroom. By carefully planning the layout and choosing the right fixtures, you can make even the smallest bathrooms feel more spacious and organized.

4. Eco-Friendly Upgrades

Sustainability is a growing concern for homeowners, and bathroom renovation Auckland projects are increasingly incorporating eco-friendly upgrades. Water-saving fixtures, such as low-flow toilets and showerheads, can reduce your water consumption without compromising performance. Energy-efficient lighting and heating options, like LED bulbs and underfloor heating, also contribute to a greener home. By choosing environmentally friendly materials and technologies, you can create a beautiful bathroom that aligns with your values.

5. Custom Design Elements

Personalization is a significant trend in bathroom renovation Auckland. Homeowners are looking for ways to infuse their unique style into their bathroom spaces. Custom design elements, such as bespoke cabinetry, personalized tile patterns, and unique lighting fixtures, allow you to create a bathroom that reflects your taste and personality. Working with a skilled designer can help you bring your vision to life, ensuring that every detail is tailored to your preferences.

Conclusion

A bathroom renovation in Auckland offers numerous opportunities to incorporate innovative solutions and trends that enhance both functionality and style. From smart technology and luxurious materials to space optimization and eco-friendly upgrades, there are many ways to transform your bathroom into a modern oasis. By exploring these innovative options, you can create a space that not only meets your practical needs but also provides a relaxing retreat from the hustle and bustle of everyday life.

If you’re considering a bathroom renovation Auckland, these trends and solutions can guide you in creating a space that is both beautiful and functional. With careful planning and the right expertise, your bathroom renovation can become a standout feature of your home.

0 comment
0 FacebookTwitterPinterestEmail